Side Dishes
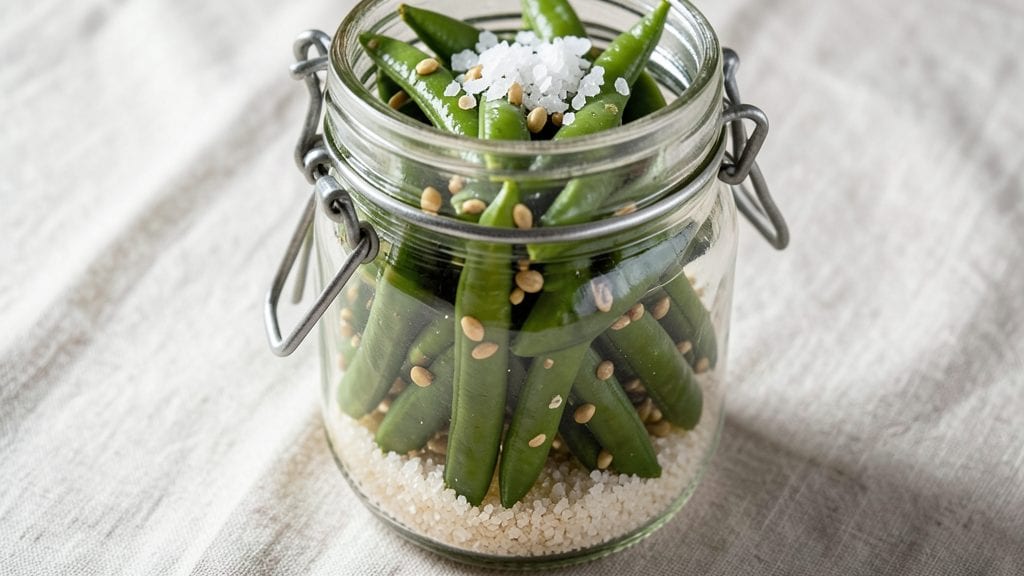
This old-fashioned pickled green beans recipe brings that tangy, vinegar-bright crunch straight from my Nonna's kitchen to your table—15 minutes of prep that delivers restaurant-quality flavor with simple pantry staples.
The secret lies in the balance of sharp vinegar, warm spices, and fresh herbs that transform humble green beans into something irresistible. I first made these after burning a batch of gnocchi and needed a quick, foolproof side that wouldn't require constant attention.
The beauty of this recipe is its versatility—whether you're canning for long-term storage or making a quick refrigerator batch, the technique remains the same.
Sterilized jars, a hot vinegar brine, and a medley of mustard seeds, garlic, and dill create that signature tangy crunch that pairs perfectly with everything from grilled meats to sandwiches.
My family insists these are better than anything store-bought, and I've tested them in every possible scenario—from backyard BBQs to weeknight dinners.
What you'll end up with is a jar of vibrant green beans that stay crisp-tender with every bite, their flavor brightened by the aromatic vinegar mixture. The process is straightforward: blanch the beans, pack them into jars, and pour the hot brine while it's still steaming.
No fancy equipment needed—just patience and the right balance of ingredients. This recipe has become my go-to for preserving summer's bounty, and once you try it, you'll never go back to the canned version.
Perfect for gifting, meal prepping, or serving alongside your favorite main dishes, these pickled green beans keep well for months in the pantry or last up to a week in the refrigerator. Let's get started on creating a batch that will have everyone asking for seconds—and maybe even thirds.
Ingredients for old fashioned pickled green beans
Pantry staples plus a handful of fresh herbs—your Nonna's secret to tangy, crisp green beans in jars.
| Ingredient | Amount | Notes |
|---|---|---|
| Fresh Green Beans 🥦 | 1 ½ lb | Trimmed, ends snapped off |
| White Vinegar 🍶 | 2 cups | Distilled, 5% acidity preferred |
| Water 💧 | 2 cups | Filtered or boiled for clarity |
| Granulated Sugar 🍚 | 1 cup | White or raw preferred |
| Salt 🧂 | 1 ½ tbsp | Kosher or sea salt |
| Mustard Seeds 🌶️ | 1 ½ tbsp | Yellow or brown preferred |
| Garlic Cloves 🧄 | 4 cloves | Smashed, not minced |
| Fresh Dill 🌿 | ¼ cup | Chopped, stems removed |
| Black Peppercorns 🌶️ | 1 tsp | Crushed lightly |
| Bay Leaves 🌿 | 2 whole | Fresh or dried |
| Red Wine Vinegar 🍷 | ½ cup | For depth of flavor |
| Canning Salt 🧂 | 1 tsp | For jar packing |
| Lemon Peels 🍋 | 1 whole | Thinly sliced, optional |
The green beans need to be fresh and crisp—hit the farmers market if you can, but even grocery store beans work if they're bright green and not limp. Trader Joe's or Whole Foods have the best quality, but any store's pre-washed beans are fine. Look for thick beans (about 1/4-inch diameter) for that perfect crunch. The vinegar is non-negotiable—white vinegar for brightness, red wine vinegar for depth. If you can't find red wine vinegar, a splash of balsamic in the brine works too. Mustard seeds? Penzeys carries the best, but the yellow ones in the spice aisle are fine—just make sure they're whole and not dusty.
No fresh dill? Dried dill at half the amount works, but trust me, fresh makes all the difference. Running low on bay leaves? Dried thyme or oregano can sub in a pinch, but the flavor won't be quite the same. The sugar helps balance the vinegar's sharpness—brown sugar works too if you're out of white. For canning, sterilize your jars properly—boiling them for 10 minutes in hot water is the way to go. If you're doing a quick fridge batch, just use clean jars. The lemon peels are optional but add a bright citrus note that pairs perfectly with the vinegar—skip them if you're not a fan of that zesty kick.
These keep months in the pantry if canned properly, or up to a week in the fridge. I always make extra—gifts these to neighbors during the holidays, and they always come back for seconds. For canning, process pint jars in a water bath for 10 minutes, and quarts for 15 minutes. Once opened, store in the fridge and use within 5-7 days. The flavor actually improves over time, so don't be afraid to make a big batch. Leftovers? Toss them into salads, sandwiches, or eat straight from the jar with a sprinkle of flaky salt.
Why You'll Love This Recipe
- Five-Ingredient Magic: I swear by this—just beans, vinegar, water, sugar, and salt. That’s it. No fancy jars, no confusing ratios, just a pot and a jar. Honestly, if you can boil water, you can do this.
- Tangy Crunch Perfection: The vinegar cuts through the sweetness of the sugar, giving those green beans that just-right bite. The beans stay crisp—no mushy nonsense—because the brine works its magic overnight. Between us, that first crunch is my favorite part.
- Pantry Staple Power: This recipe uses things you already have. No last-minute grocery runs, no weird ingredients. And once you make a batch? It’s your go-to for sandwiches, salads, or even as a snack straight from the jar. (Yes, even on a Tuesday night.)
- Make-Ahead Miracle: I make a big jar on Sunday, and it lasts me weeks. Perfect for meal prep, potlucks, or when you forget to buy veggies. Plus, the longer they sit, the better they taste—like a flavor upgrade over time. My secret weapon for lazy days.
Step-by-step instructions for old fashioned pickled green beans
Here's how to make crisp-tender green beans with that classic tangy crunch—no fancy equipment needed.
Trim and Blanch the Green Beans
Start by rinsing the 1.5 lb fresh green beans under cold water, then snap off the ends where the beans naturally bend. I like to work in batches—trim about 1 cup at a time to keep things manageable. Spread them on a clean kitchen towel to dry while you prepare the rest.
Bring a large pot of salted water to a rolling boil. Add the trimmed green beans and cook for exactly 3-4 minutes—they should be bright green but still slightly crisp. The moment they turn dull green or start to soften, drain them immediately in a colander and rinse under cold water. This quick blanch preserves their vibrant color and texture while preparing them for pickling.
Prepare the Pickling Liquid
In a clean 1-quart jar or large saucepan, combine the 2 cups white vinegar, 2 cups water, 1 cup granulated sugar, 1.5 tbsp salt, 1.5 tbsp mustard seeds, 4 smashed garlic cloves, 0.25 cup chopped fresh dill, 1 tsp crushed black peppercorns, and 2 whole bay leaves. Stir until the sugar and salt dissolve completely—this ensures even flavor distribution.
Add the 0.5 cup red wine vinegar and 1 whole lemon peels (if using) to the mixture. The lemon peels add a bright citrus note that pairs beautifully with the tangy vinegar. Bring the liquid to a gentle simmer over medium heat, stirring occasionally to prevent the sugar from settling at the bottom. Let it simmer for 5 minutes to meld the flavors.
Pack and Seal the Beans
Pack the blanched green beans tightly into a clean, sterilized quart-sized jar. Use a wooden spoon to press them down gently, leaving about ½ inch of headspace at the top. This prevents the beans from breaking during processing and allows room for the liquid to expand.
Ladle the hot pickling liquid over the beans until they're completely covered. Add the 1 tsp canning salt to the jar, then seal it tightly. If you're not processing the jar immediately, you can refrigerate it for up to 2 weeks—the beans will still develop great flavor, though they'll be less crisp.
Process for Long-Term Storage (Optional)
For shelf-stable pickled green beans, place the sealed jar in a large pot of water, ensuring the jar is fully submerged. Bring the water to a boil and process for 10 minutes at 0 elevation (adjust time if you live at a higher altitude). This heat treatment ensures food safety and extends shelf life.
Remove the jar from the pot and let it cool completely on a wire rack. Once cooled, store in a dark, cool place for up to 1 year. The longer they sit, the more complex and tangy the flavor becomes. When ready to serve, open the jar and enjoy the beans straight from the fridge—they'll be crisp-tender with a bright, vinegary bite that's perfect for sandwiches, salads, or as a side dish.
Pro Tips For Making Old Fashioned Pickled Green Beans
- Trim and Snap: DESCRIPTION: Cut off the ends but don’t waste time snapping—just trim the tough stems with a knife. I used to snap them like a pro, but it’s faster and cleaner this way, especially with a big batch. (Your hands will thank you too.)
- Boil Until Bright: DESCRIPTION: Don’t just blanch—boil the beans until they’re firm but vivid green, about 3-4 minutes. Overcooking turns them mushy, and undercooking leaves them raw. Test one: it should pierce easily but still hold shape.
- Vinegar First, Sugar Second: DESCRIPTION: Mix the vinegar and water before adding sugar—it dissolves faster and prevents clumpy brine. I learned this the hard way when my first batch had gritty sediment. Stir well, then add sugar last.
- Sterilize Jars Properly: DESCRIPTION: Run jars and lids through a hot dishwasher cycle or boil them for 10 minutes—no shortcuts. I once skipped this and my beans grew mold. Trust me, 10 minutes now saves weeks of regret later.
Storing and reheating your old fashioned pickled green beans
Refrigerator Storage
Your freshly pickled green beans will stay fresh in the fridge for up to 2 weeks if stored properly. I always use glass quart jars with airtight lids—the kind from Ball or Mason—to maintain crispness.
After packing and sealing, place the jar in the fridge and let it cool completely before storing. The beans will develop deeper flavor over time, especially if you add a splash of extra vinegar before sealing.
Trust me, the first time I opened a jar after a week and got that tangy aroma, I knew I'd found my new favorite way to preserve summer produce. 🌿
Pantry Canning
For long-term storage, process your jars in a water bath for 10 minutes at 0 elevation to ensure safety and shelf stability. I use a Presto 922 canner because it's reliable and fits all my quart jars.
After processing, let jars cool completely on a towel-lined counter before storing in a dark pantry. Properly canned beans will keep for 12-18 months, though I usually go through them within a few months—they're perfect for holiday gifts or last-minute meal prep. 📦
Reheating Tips
These pickled green beans don't need reheating—they're best served straight from the fridge for maximum crunch. However, if you're using them in a warm dish like pasta or soup, heat them gently in the liquid for 2-3 minutes over medium-low heat.
Never boil them, or they'll turn mushy. I like to toss them into warm dishes at the very end to preserve their bright flavor and crisp texture. For cold dishes, just drain and serve as-is—they're perfect for sandwiches or salads. ✨
Freezing Shortcuts
If you don't have time to can or refrigerate, freezing is a great backup. Pack the cooled, pickled beans into freezer-safe bags, squeezing out excess air to prevent freezer burn. They'll keep for 3-4 months in the freezer.
When ready to use, thaw in the fridge overnight and drain before serving. The texture won't be quite as crisp as fresh, but the tangy flavor remains intact. This method saved me more than once when I had extra beans from the garden. ❄️
Reviving Flavor
If your pickled beans lose some of their tang over time, don't toss them! Warm 1 tbsp of the pickling liquid in a small saucepan, add ½ tsp vinegar, and stir into the jar before resealing.
This quick fix restores the bright flavor. I've done this with jars that were past their prime, and they always taste fresh again. It's like giving them a second life—just what my Nonna would do. 💫
Gifting Made Easy
These pickled green beans make the perfect homemade gift. Package them in pretty glass jars tied with twine and a handwritten label. I like to include a note with the date they were made and a little recipe card for serving suggestions.
My neighbors always ask for seconds when I bring them over—it's become my signature gift for holidays and housewarming parties. The best part? They're always appreciated more than store-bought versions. 🎁
Nutrition facts
Frequently asked questions
Can I use frozen green beans instead of fresh?
Fresh beans are ideal for that perfect crunch, but frozen will work in a pinch. Just thaw them first, drain well, and give them a quick 1-minute blanch in boiling water to restore some texture. The flavor won't be quite as bright as fresh, but it's still delicious for refrigerator pickling. Never use canned beans—they're too soft and mushy for this recipe.
How do I know when my pickled beans are ready?
For refrigerator pickling, they're ready immediately—just let them sit for at least 24 hours before eating to let flavors meld. For canned versions, wait 1 week before opening. The beans should be vibrant green with a bright, tangy aroma when the jar is opened. If they smell off or look dull, discard them—they've gone bad.
Can I adjust the spice level for kids?
For milder flavor, reduce the mustard seeds to 1 tsp and skip the red wine vinegar. You can also omit the crushed peppercorns and use just 1 bay leaf instead of 2. The white vinegar and garlic will still provide that classic tang without being too intense. Kids will love the sweetness of the sugar and the crunchy texture.
What's the best way to use up leftover pickling liquid?
Don't waste that flavorful brine! Use it to make quick pickles with radishes, carrots, or even red onions. It also makes an excellent marinade for meats or a tangy dressing for salads. Store it in the fridge for up to 2 weeks—just heat it gently before using to kill any bacteria. My Nonna used to call it "liquid gold" for this exact reason.
Why did my pickled beans turn out too soft?
Overcooking during blanching or improper storage are the most common culprits. Always blanch for exactly 3-4 minutes—no longer! For refrigerator pickling, make sure your jars are completely sealed to prevent air exposure. If canning, check your processing time—under-processing leads to softness. For future batches, try adding ½ tsp citric acid to the brine to help maintain crispness.