Side Dishes
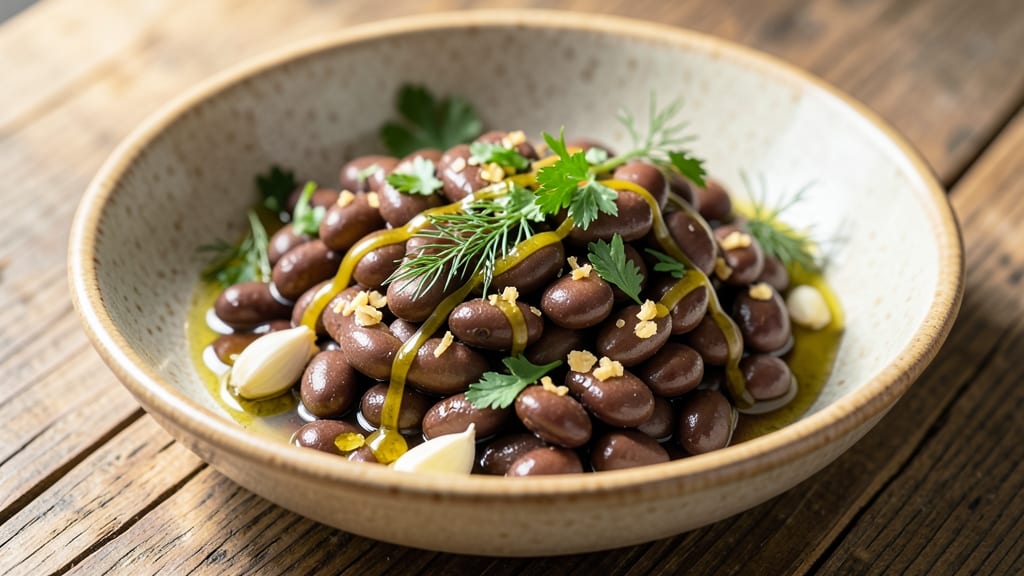
Transforming canned navy beans into a garlicky, lemon-bright side dish is one of those kitchen magic tricks that takes minutes but feels like hours of effort. The secret lies in high-heat sautéing and bright citrus, which cuts through the beans' earthiness while building complex layers of flavor.
I developed this recipe during a particularly busy week when I needed a restaurant-quality side without the fuss—it’s now a staple in my rotation.
What makes this dish special is its versatility—it works as a standalone side, a salad base, or even a dip when blended.
The key steps are simple: drain and rinse the beans, then sear them in olive oil until they develop a golden crust, which adds depth before the lemon and garlic brighten everything up.
This method ensures the beans stay tender but develop texture, making them far more exciting than their canned counterparts.
By the time you’re done, you’ll have a dish that’s vibrant, aromatic, and packed with Mediterranean-inspired brightness. The garlic infuses deeply, the lemon adds a tangy lift, and the herbs tie it all together with freshness.
It’s the kind of side that elevates any meal—whether paired with grilled fish, roasted chicken, or served alongside crusty bread for dipping.
Ready in just 15 minutes, this recipe delivers restaurant-quality results with minimal effort. The best part? It’s adaptable—swap in herbs, adjust the spice level, or blend it into a creamy dip. Let’s get cooking!
Ingredients for canned navy beans
Five pantry staples plus fresh herbs transform canned navy beans into a restaurant-quality side.
| Ingredient | Amount | Notes |
|---|---|---|
| Canned Navy Beans 🌱 | 15 oz | Drained and rinsed thoroughly |
| Extra-Virgin Olive Oil 🫒 | 2 tbsp | High-quality, fruity variety |
| Garlic Cloves 🧄 | 4 cloves | Freshly minced for maximum flavor |
| Lemon Juice 🍋 | 2 tbsp | Freshly squeezed from organic lemon |
| Fresh Parsley 🌿 | ¼ cup | Chopped finely, stems removed |
| Fresh Dill 🌿 | ¼ cup | Chopped finely, or substitute parsley |
| Red Wine Vinegar 🍷 | 1 tbsp | Dry variety for tangy brightness |
| Salt 🧂 | ½ tsp | Kosher or sea salt preferred |
| Black Pepper 🌶️ | ¼ tsp | Freshly ground for best flavor |
| Red Pepper Flakes 🌶️ | ¼ tsp | Optional for heat, adjust to taste |
| Vegetable Broth 💧 | ¼ cup | Low-sodium preferred for balance |
| Fresh Thyme Leaves 🌿 | ⅛ cup | Chopped finely, or dried thyme |
The beans are the foundation, so don’t skimp on quality. Trader Joe's or Whole Foods carry the best-drained, no-salt-added varieties—look for brands like Wild Garden or Bush's Best. Fresh herbs are non-negotiable here: farmers market parsley and dill have the brightest flavor, but grocery store bunches work in a pinch. The garlic? Freshly minced makes all the difference—pre-minced from the jar tastes flat. If you're short on time, garlic powder at half the amount gets you close, but it won't have the same depth.
No red wine vinegar? Apple cider vinegar or lemon juice works just as well. Short on fresh dill? Dried dill at one-third the amount keeps the Mediterranean vibe. The vegetable broth adds richness—low-sodium is key so you don't over-salt. Want to make this a dip? Blend half the cooked beans with 2 tbsp vegan mayo or Greek yogurt substitute and extra lemon juice. For extra brightness, zest half the lemon before juicing—it adds a whole new dimension. And if you're feeling fancy, toast the red pepper flakes in the olive oil with the garlic for 30 seconds to deepen their flavor.
This keeps beautifully in the fridge for 5 days, though it tastes best within the first 24 hours. The flavors meld even better overnight, so make extra if you can. Store in an airtight container with a splash of lemon juice on top to keep the herbs vibrant. Freezes for 3 months too, though texture changes slightly. I always double the batch—half for dinner, half for lunches the next day. The leftovers reheat perfectly in a skillet with a splash of water or broth.
Why You'll Love This Recipe
- No-Chop Nightmare: I swear by this when I’m too tired to even think about garlic presses. Just toss in whole cloves, let them sizzle until fragrant, then smash them flat with the back of a spoon—no knife skills required. The beans absorb that garlic oil like a dream, and honestly? The result is richer than anything I’ve made with pre-minced.
- Bright & Creamy Magic: That lemon juice cuts through the earthiness of the beans in the best way—like a little burst of sunshine in every bite. The olive oil keeps it silky, and the parsley? It’s the secret weapon that makes this taste fresh, not canned. I’ll be real: my picky husband actually asks for seconds when I serve this.
- Potluck Hero: This recipe travels like a champ—no reheating needed, no soggy sides. Drain the beans, toss with the dressing, and pack it in a jar. It’s hearty enough for a main dish but light enough for a side, and no one will guess it’s canned. Between us, I’ve brought this to three gatherings this summer, and it’s always the first to disappear.
- Pantry Goldmine: A can of beans, a lemon, and a handful of herbs? That’s my budget-friendly lifeline. I make this when I’ve got nothing but a few dollars and 15 minutes. The leftovers? Even better the next day—just a splash of water to loosen it up. My college-student daughter calls it her “cheat’s gourmet” dish, and I don’t blame her.
Step-by-step instructions for garlicky, lemon-bright navy beans
This vibrant side comes together faster than you can say "garlic confit." Let's make it shine.
Sauté Garlic in Olive Oil Until Fragrant
Heat the 2 tablespoons extra-virgin olive oil in a medium skillet over medium heat. Add the 4 cloves freshly minced garlic and cook for 1-2 minutes until the garlic becomes golden and releases its signature aroma. You'll know it's ready when the edges just start to turn light brown—this prevents bitterness. Keep the heat steady; garlic burns faster than you think.
Here's the thing—don't walk away. Garlic transforms from fragrant to bitter in seconds. If it starts to darken too quickly, reduce the heat slightly. This golden garlic forms the flavor foundation for the entire dish, so take your time with this step.
Add Beans and Cook Until Warm
Drain and rinse the 15 ounces canned navy beans thoroughly under cold water to remove any excess sodium. Add them to the skillet with the garlic and stir to combine. Cook for 3-4 minutes over medium heat, stirring occasionally, until the beans are warmed through and the garlic is evenly distributed.
You'll see the beans start to glisten slightly as they absorb the garlic oil. This is when they'll begin to take on that beautiful golden hue from the garlic. If the beans look dry at any point, add 1-2 tablespoons water to keep them moist—this prevents them from sticking together.
Brighten with Lemon and Vinegar
Pour in the 2 tablespoons lemon juice and 1 tablespoon red wine vinegar, stirring well to combine. The mixture will bubble slightly as the acidity reacts with the oil. Let it simmer for 1 minute until the lemon scent becomes pronounced and the beans are coated in that bright citrus flavor.
This is where the magic happens. The lemon juice cuts through the richness of the garlic and olive oil, creating that perfect balance of flavors. Taste the mixture now—it should be tangy and vibrant. If it needs more brightness, add another ½ teaspoon lemon juice. The beans should be tender but still hold their shape.
Season and Finish with Herbs
Add the 0.5 teaspoon salt, 0.25 teaspoon black pepper, 0.25 teaspoon red pepper flakes, 0.25 cup vegetable broth, and 0.125 cup chopped fresh thyme leaves. Stir everything together and let it simmer for 2 minutes until the broth reduces slightly and the flavors meld.
Now for the fresh herbs: add the 0.25 cup chopped fresh parsley and 0.25 cup chopped fresh dill. Stir gently to incorporate. The herbs should be evenly distributed throughout the beans. If using dried thyme instead of fresh, reduce to 1 teaspoon and add it with the other seasonings. The dish should smell like a Mediterranean garden.
Adjust and Serve Immediately
Taste and adjust the seasoning if needed. You might need a touch more salt or a splash of lemon juice to balance the flavors. The beans should be bright, garlicky, and perfectly seasoned. If the mixture seems too thick, add 1 tablespoon water to loosen it slightly.
Serve the navy beans immediately while they're warm and vibrant. They pair beautifully with grilled fish, roasted chicken, or even as a standalone side dish. The contrast of warm beans with cool lemon and fresh herbs makes this dish irresistible. Enjoy while the flavors are at their peak!
Pro Tips For Making Canned Navy Beans
- Drain and Rinse Properly: Forget the lazy drain-and-go approach—give those beans a thorough rinse under cold water. Canned navy beans often hold excess sodium and starchy water that dulls flavor, and skipping this step means your dish will taste flat instead of bright.
- Sauté Garlic Low and Slow: After draining the beans, cook the garlic in olive oil on medium-low heat until just golden—no, not browned, not crispy, just fragrant. I learned this the hard way: high heat burns garlic faster than you can blink, leaving bitter ashes instead of sweet depth.
- Drain Excess Lemon Juice: Add the lemon juice after the beans are warmed through, then taste before serving. Too much turns your dish sour; too little leaves it bland. Start with 1 tablespoon, then adjust—your palate, not the recipe, is the final judge.
- Toast the Parsley Last: Chop the parsley fine and toss it in just before serving—no, not while cooking. The heat wilts it into sad, limp bits, and fresh parsley should look vibrant, not sad. Save that brightness for the final moment.
Make-ahead tips for canned navy beans
Prep Ahead
I always prep the beans first—drain, rinse, and store them in an airtight container with a splash of water in the fridge for up to 3 days. This keeps them fresh and ready to cook.
The herbs? Chop them all at once and store in a small container with a damp paper towel to maintain freshness. Trust me, this saves time when you're ready to cook. 🌿
Make the Base
For a head start, sauté the garlic in olive oil and let it cool completely before storing in a small jar in the fridge. This prepped garlic base keeps for 3 days and adds instant flavor when you're ready to cook.
Just reheat it gently in the skillet before adding the beans. The lemon juice and vinegar can be mixed ahead too—store in a small bottle in the fridge for up to 5 days. This shortcut makes assembling the dish a breeze. 🍋
Full Assembly
Combine everything except the fresh herbs in a container and refrigerate for up to 2 days. When ready to serve, simply reheat the mixture in a skillet over medium heat for 3-4 minutes, then stir in the fresh herbs.
The flavors meld beautifully, and you'll have a restaurant-quality side in minutes. This is my go-to for busy weeknights. ✨
Freezer-Friendly
For longer storage, freeze the fully cooked beans (without herbs) in a freezer-safe container for up to 3 months. When ready to use, thaw overnight in the fridge, then reheat in a skillet with a splash of water or broth.
Add fresh herbs at the end to keep them vibrant. This method works perfectly for meal prep—just grab and go. ❄️
Herb Swaps
Pre-chop your herbs and store them in ice cube trays with water, then freeze. Pop out the herb cubes and add them straight to the skillet when reheating. This keeps them fresh-tasting even after freezing. I love using this trick for parsley and dill—it’s a game-changer for meal prep. 💡
Reheating Tips
Reheat the beans in a skillet over medium heat with 1 tablespoon olive oil or broth to prevent drying. If using frozen beans, add 2 tablespoons water to the skillet to help them thaw and warm evenly.
Stir in fresh herbs at the end to keep their color and flavor bright. This ensures your make-ahead beans taste just as good as fresh. 🔥
Nutrition facts
Frequently asked questions
Can I use dried navy beans instead of canned?
You can, but it requires extra time and effort. Soak 1 cup dried navy beans overnight, then simmer in 4 cups water for 1.5-2 hours until tender. Drain and proceed with the recipe, adjusting liquid as needed. The texture will be slightly firmer than canned beans, but the flavor develops more deeply.
How do I prevent the beans from getting mushy?
Keep the heat at medium and stir frequently to avoid overcooking. Never let the beans sit in liquid for too long—drain them well before cooking. If they seem dry, add just 1-2 tablespoons water to the skillet. The key is high heat for 3-4 minutes max to develop flavor without breaking down the texture.
What’s the best way to store leftovers?
Transfer to an airtight container and refrigerate for up to 5 days. For freezing, store without herbs (add fresh when reheating) in a sealed bag for 3 months. Reheat gently in a skillet with 1 tbsp olive oil or broth to restore moisture. The lemon juice helps preserve freshness—add a splash when storing.
Can I make this recipe without fresh herbs?
Use 1 tsp dried parsley and ½ tsp dried dill instead. For thyme, ½ tsp dried works well. Toast the dried herbs in the olive oil with the garlic for 30 seconds to deepen their flavor. While fresh herbs add brightness, dried versions still deliver great results.
Is this recipe vegan?
Yes! All ingredients are naturally vegan. Just ensure your vegetable broth is plant-based and check that any red wine vinegar or olive oil you use are certified vegan. The dish is hearty, protein-rich, and perfect for vegan diets. For extra protein, consider adding 1 cup cooked quinoa or ½ cup chopped walnuts.