Desserts
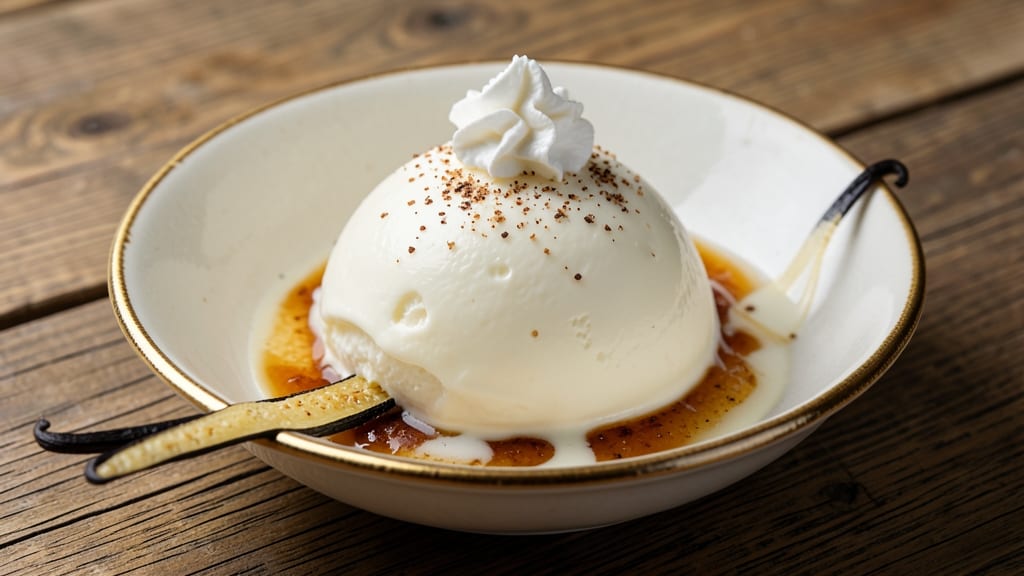
There's nothing quite like the rich, velvety swirls of homemade vanilla bean ice cream made the old-fashioned way—where every spoonful carries the deep, aromatic essence of real vanilla.
The secret lies in scraping the seeds directly from the pod and infusing them into a perfectly tempered custard, then churning it to silky perfection. I've perfected this recipe over years of weekend experiments, and the difference between this and store-bought is undeniable.
The process begins with a classic French-style custard base, where egg yolks and sugar create a stable foundation that prevents iciness.
Heating the cream and milk to just the right temperature ensures the yolks cook gently without scrambling, while the vanilla bean's natural oils and seeds infuse the mixture with unmatched depth.
This isn't just vanilla-flavored—it's true vanilla bean ice cream, where every bite carries those signature black specks and a flavor that lingers.
What you'll end up with is ice cream of restaurant-quality smoothness, with a texture so creamy it practically melts on the tongue. The traditional method of slow churning (whether with an ice cream maker or the no-churn alternative) develops the perfect consistency, and proper aging ensures a velvety finish.
This is the kind of dessert that turns ordinary evenings into special occasions—simple to make, but impossible to forget.
Whether you're serving it at a summer gathering or treating yourself to a late-night indulgence, this recipe delivers results that will have everyone asking for seconds. The best part?
It keeps beautifully in the freezer for weeks, so you can enjoy this old-fashioned luxury whenever the craving strikes. Let's get started on creating something truly timeless.
Ingredients for old fashioned vanilla bean ice cream
Simple ingredients, luxurious results—this is how you make real vanilla bean ice cream.
| Ingredient | Amount | Notes |
|---|---|---|
| Heavy Whipping Cream 🥛 | 2 cups | Full-fat for best texture |
| Whole Milk 🥛 | 1 cup | Warmed for smooth blending |
| Large Egg Yolks 🥚 | 6 whole | Fresh, room temperature |
| Granulated Sugar 🍚 | 1 cup | White or light brown |
| Vanilla Beans 🌿 | 2 whole | High-quality, Madagascar preferred |
| Unsalted Butter 🧈 | 2 tbsp | Cold, cubed for churning |
| Salt 🧂 | ¼ tsp | Fine sea salt |
| Vanilla Extract 🌿 | 1 tsp | Pure, for extra depth |
The vanilla beans are the star here—Madagascar beans have that classic depth, but Tahitian adds floral notes. Penzeys or Williams Sonoma sell the best quality, but any reputable spice shop will have them. Split each bean lengthwise, scrape the seeds with a knife, then drop the pods into the warm cream. This infuses the cream with oils and seeds for that signature speckled look. Don't skip the pods—they add subtle flavor and texture. For the cream, full-fat heavy cream is non-negotiable—it churns to a silky texture store-bought can't match.
No vanilla beans? Pure vanilla extract plus a pinch of sugar works in a pinch, but you'll miss those black specks and complex aroma. Running out of butter? Coconut oil or extra cream can substitute, though texture may vary slightly. The milk can be swapped for half-and-half if you're in a rush, but the custard won't be as rich. For the sugar, turbinado or coconut sugar adds a subtle caramel note—worth trying if you're feeling experimental. And if you're using an ice cream maker, make sure it's clean and dry—any moisture ruins the churning process.
This ice cream tastes even better after aging 24 hours, but it keeps beautifully for up to 2 months in an airtight container. For serving, let it sit at room temperature for 10 minutes—it'll be smoother and more scoopable. I always make a double batch because it disappears fast. Store any leftovers in a metal or glass container (plastic absorbs odors), and if you're gifting it, use a parchment-lined container so it doesn't stick.
Why You'll Love This Recipe
- No Fuss, Big Payoff: I swear by this recipe because it’s the kind of dessert that feels fancy but doesn’t demand hours. Just heat the cream and milk, whisk in yolks and sugar, scrape in the vanilla seeds—boom. The custard thickens while you’re still deciding what to watch on TV.
- Velvet Vanilla Magic: That first spoonful? Pure comfort. The vanilla bean’s deep, floral aroma wraps around your tongue, while the egg yolks give it a silky, almost custardy richness. It’s not just vanilla—it’s the kind that makes you pause and think, “Wait, is this too good?”
- Every Occasion Ready: This ice cream is my go-to for summer picnics, holiday dessert tables, or just because. (Yes, even on a Tuesday night.) It’s elegant enough for company but simple enough to make when you’re craving something creamy and don’t want to fuss.
- Leftovers? Best Part: Between us, the first batch never lasts. But if you somehow have extras? They’re even better the second day—smoother, more intense in flavor. And because it’s made with pantry staples, you’re not breaking the bank for a treat that tastes like a splurge.
Step-by-step instructions for old fashioned vanilla bean ice cream
This classic custard method delivers silky-smooth ice cream with real vanilla bean swirls every time.
Infuse the Cream and Milk with Vanilla Beans
Split the 2 whole vanilla beans lengthwise and scrape out the seeds with the tip of a knife. Place the seeds and split beans into a small saucepan with the 2 cups heavy whipping cream and 1 cup whole milk. Bring to a gentle simmer over medium heat, then reduce to low heat and let steep for 15 minutes. You'll see the liquid turn a pale golden color and smell intensely vanilla—this is where the magic happens.
Remove from heat and let steep for another 10 minutes off the stove. This extended steeping ensures maximum vanilla flavor extraction. Strain through a fine-mesh sieve into a clean bowl, pressing gently on the beans to release all the flavor. Discard the used beans—they've given everything they've got.
Make the Custard Base
In a separate bowl, whisk together the 6 whole egg yolks, 1 cup granulated sugar, and 0.25 tsp salt until the mixture is pale yellow and slightly thickened—about 3-4 minutes of whisking. This step is crucial for creating a stable custard that won't turn icy.
Slowly pour the warm vanilla-infused cream mixture into the egg yolk mixture while whisking constantly. This gradual addition prevents scrambling the eggs. Return the combined mixture to the saucepan and cook over medium-low heat, stirring constantly with a wooden spoon, until it reaches 170°F on an instant-read thermometer. The custard should coat the back of the spoon and leave a clear path when you run your finger through it.
Finish and Chill the Custard
Remove the custard from heat and immediately whisk in the 2 tbsp cold unsalted butter, cut into small cubes. The butter adds richness and prevents ice crystals from forming later. Stir in the 1 tsp vanilla extract for an extra depth of flavor. Let the custard cool to room temperature, then cover with plastic wrap pressed directly onto the surface to prevent a skin from forming.
Refrigerate for at least 4 hours or overnight. This long chilling time is essential for developing the perfect texture. The custard should be completely cold before churning—if it's warm, it won't thicken properly in the ice cream maker.
Churn to Creamy Perfection
Pour the chilled custard into your ice cream maker and churn according to the manufacturer's instructions, typically 20-25 minutes. You'll know it's ready when it forms soft peaks when scooped—it should hold its shape but still be scoopable. If your ice cream maker doesn't have a self-eject function, transfer to a freezer-safe container and freeze for 1-2 hours to firm up.
For the signature swirls, scoop the ice cream into serving dishes and use a skewer to create decorative patterns. The contrast of the creamy vanilla custard with the dark vanilla bean flecks makes this ice cream truly special. Serve immediately for the creamiest texture, or let it sit at room temperature for 5 minutes before serving to soften slightly.
Pro Tips For Making Old Fashioned Vanilla Bean Ice Cream
- Scrape the Pan: After simmering the egg yolk mixture, don’t just wipe the bottom of the pan—scrape it aggressively with a silicone spatula. Those stubborn bits stuck to the bottom are rich, flavorful custard that’ll make your ice cream taste like it came from a Parisian glacier. (Yes, even if it means scrubbing for 10 seconds longer.)
- Split the Vanilla: Crack open the vanilla bean lengthwise and scrape out the seeds before adding it to the warm custard. If you skip this, you’ll end up with a few weak splashes of vanilla flavor instead of a deep, aromatic punch. Pro move: Save the scraped-out pod for infusing simple syrup or sugar next time.
- Chill the Bowl: Place your mixing bowl in the freezer for at least 15 minutes before whipping the chilled custard. Cold tools = faster whipping, and you’ll avoid the sad, grainy texture that comes from fighting warm cream. (I learned this the hard way after making ice cream that looked like wet sand.)
- Strain Twice: First strain the custard through a fine-mesh sieve to catch any stray egg bits, then strain it again through cheesecloth for a silky finish. The second strain might feel overkill, but it’s the difference between "homemade" and "restaurant-quality" creaminess. (Your ice cream churn will thank you.)
Flavor customization for these flavors
Classic Vanilla Bean Variations
For a brown sugar caramel twist, replace ½ cup granulated sugar with ½ cup light brown sugar and add ¼ cup caramel sauce (homemade or store-bought) to the custard base. The molasses notes in brown sugar deepen the vanilla flavor, while the caramel swirls create a luxurious texture. 🍯
Try Mexican vanilla by adding ½ tsp ground cinnamon and ¼ tsp ground cloves to the custard. This warm spice blend complements the vanilla beautifully, creating a cozy, aromatic profile perfect for fall gatherings.
Flavor Boosters
Enhance the vanilla with toasted coconut flakes—add ½ cup unsweetened coconut flakes to the warm cream while infusing with vanilla beans. Let them steep alongside the beans for 15 minutes, then strain out the beans and flakes before mixing with the egg yolks.
The coconut adds a tropical contrast to the classic vanilla.
For a citrus kick, infuse the cream with zest from 1 lemon or lime along with the vanilla beans. The bright acidity cuts through the richness, creating a refreshing balance. Add the zest to the cream at the beginning and remove it after straining.
Seasonal Twists
In summer, blend in fresh berries—after churning, fold in ½ cup mixed berries (strawberries, raspberries, or blueberries) for a fruity swirl. Use a spoon to gently mix them in, creating marbled pockets of fruit throughout the ice cream.
For a holiday spice version, add ½ tsp ground nutmeg and ¼ tsp ground cardamom to the custard base. These warm spices evoke cozy winter flavors and pair beautifully with vanilla's natural sweetness.
Texture Experiments
Create crunchy texture layers by folding in ¼ cup crushed graham crackers or toasted almonds after churning. Press them into the bottom of your serving dish before adding the ice cream, then swirl the creamy vanilla on top for a delightful contrast of smooth and crunchy.
For a no-churn option, replace the custard base with 2 (12 oz) cans full-fat sweetened condensed milk and 1 (12 oz) can evaporated milk, then add 2 tbsp vanilla extract and 1 tsp vanilla bean paste.
Churn as usual—this method skips the cooking step while still delivering creamy results. ✨
Nutrition facts
Frequently asked questions
Why does this recipe use real vanilla beans instead of extract?
Real vanilla beans add depth and complexity that extract simply can't match. The seeds create those signature speckles and provide a more intense, aromatic flavor with subtle floral and woody notes. For best results, use high-quality Madagascar beans—they're the gold standard for classic vanilla ice cream.
Can I make this without an ice cream maker?
The no-churn method uses 2 cans sweetened condensed milk and 1 can evaporated milk instead of custard. Mix with 2 tbsp vanilla extract and 1 tsp vanilla bean paste, then freeze in a shallow container, stirring every 30 minutes for 3-4 hours until firm. It won't be as creamy but still delicious!
How do I fix grainy ice cream?
Graininess usually means the custard wasn't chilled enough before churning. Always refrigerate for at least 4 hours (overnight is best). If it's already grainy, blend it briefly in a food processor or run it through an ice cream maker again for 5-10 minutes to break up ice crystals. For prevention, use full-fat dairy and avoid over-churning.
What's the best way to store leftover ice cream?
Transfer to an airtight metal or glass container (plastic absorbs odors) and press plastic wrap directly on the surface to prevent ice crystals. It keeps perfectly for 2 months in the freezer. For serving, let it sit at room temperature for 5-10 minutes—it'll be smoother and scoop easier.
Can I use Tahitian vanilla beans instead of Madagascar?
Yes! Tahitian beans have a floral, almost fruity profile compared to Madagascar's classic vanilla. For balance, reduce the sugar slightly (½ cup) since Tahitian beans are naturally sweeter. The ice cream will have a more complex, aromatic flavor that pairs beautifully with berries or citrus.