Side Dishes
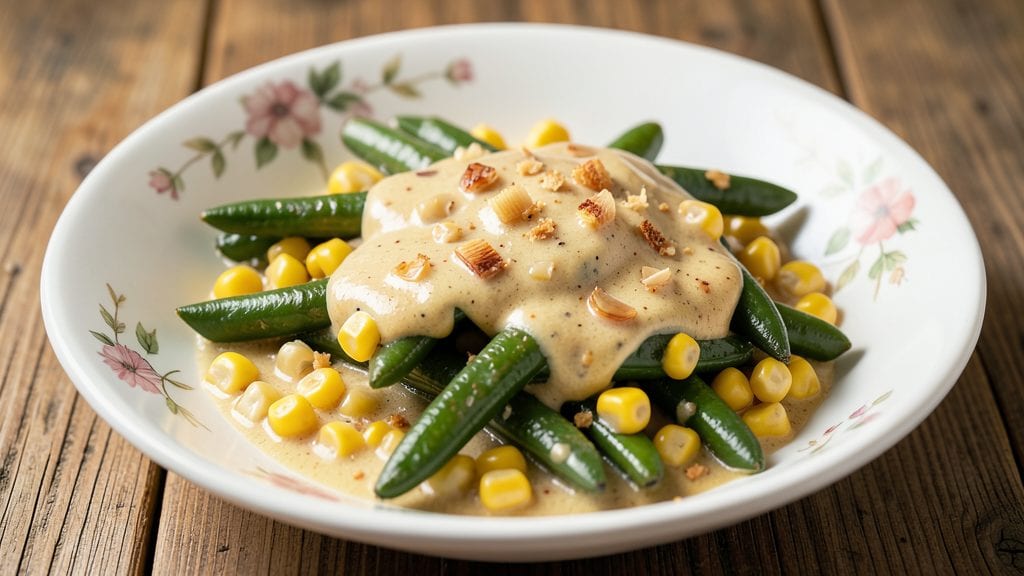
Transforming canned green beans and corn into a one-pot creamy garlic butter masterpiece proves that pantry staples can deliver restaurant-worthy results. This recipe turns simple ingredients into a rich, velvety side dish with just 15 minutes of hands-on time and minimal cleanup.
The secret lies in a simple garlic butter sauce that coats every bite, elevating humble canned vegetables into something truly special.
What makes this dish shine is its adaptability—whether you're serving it alongside grilled chicken, roasted pork, or as a standalone vegetarian meal. The recipe relies on just a few key components: canned green beans and corn, butter, garlic, and a touch of cream for that signature richness.
No fancy techniques required, just good ingredients combined in the right way.
By the end, you'll have a pot of creamy, garlicky goodness that's tender yet satisfying, with just the right balance of sweet corn and earthy green beans. The sauce clings perfectly to each vegetable, creating a dish that's as comforting as it is elegant.
This is the kind of side that makes people ask for seconds—and forgets they started with canned ingredients.
Perfect for weeknight dinners, potlucks, or meal prep, this recipe delivers flavor without the fuss. Let's turn those canned vegetables into something extraordinary.
Ingredients for canned green beans and corn
Pantry staples meet restaurant-quality technique in this velvety garlic butter creation.
| Ingredient | Amount | Notes |
|---|---|---|
| Canned Green Beans 🥦 | 1 lb | Drained, no salt added preferred |
| Canned Corn Kernels 🌽 | 1 lb | Drained, sweet varieties preferred |
| Unsalted Butter 🧈 | ½ cup | Cold, cut into small cubes |
| Garlic Cloves 🧄 | 8 cloves | Fresh, minced for even distribution |
| Heavy Cream 🥛 | ½ cup | Full-fat for optimal creaminess |
| Shallots 🧅 | 2 whole | Finely diced, or sub with onions |
| Diamond Crystal Kosher Salt 🧂 | ½ tsp | Adjust to taste, don't over-salt |
| Freshly Ground Black Pepper 🌶️ | ¼ tsp | Coarsely cracked for texture |
| Fresh Lemon Juice 🍋 | 1 tbsp | Brightens the creaminess |
| Fresh Parsley 🌿 | ¼ cup | Chopped, for garnish and freshness |
| Extra-Virgin Olive Oil 🫒 | 1 tbsp | For finishing drizzle |
| Freshly Grated Nutmeg 🌿 | ¼ tsp | Fine, for subtle warmth |
| Chicken or Vegetable Broth 💧 | ¼ cup | Low-sodium preferred |
The foundation starts with quality canned vegetables—look for brands like Green Giant or Del Monte with 'no salt added' labels to avoid waterlogged results. Fresh garlic is non-negotiable here; Whole Foods Market or Trader Joe's carry excellent cloves with vibrant color. For the butter, Plugrá or Land O'Lakes Unsalted are ideal—their high-fat content ensures proper emulsification. Shallots add depth that onions can't match, though yellow onions work in a pinch if you're in a hurry. The heavy cream should be cold when added to prevent curdling, and Hormel or Organic Valley brands deliver consistent results.
No fresh garlic? Granulated garlic at half the amount works, though texture suffers. Substituting heavy cream with half-and-half plus 1 tbsp butter maintains richness. For a dairy-free option, full-fat coconut milk creates a slightly tropical twist. The lemon juice can be bottled, but fresh yields brighter acidity. If you're avoiding nutmeg, a pinch of cinnamon adds warmth without overpowering. The broth acts as a flavor enhancer—low-sodium versions prevent salt buildup from other ingredients. For extra decadence, add 1 oz cream cheese at the end for a silky finish.
This dish reheats beautifully—simmer gently with a splash of broth to restore creaminess. Store in airtight containers for 4-5 days in the fridge, or freeze for up to 3 months by portioning into ice cube trays first. The vegetables will soften further upon reheating, so slightly undercook them initially. Garnish with parsley and a drizzle of olive oil just before serving to maintain vibrant presentation. For meal prep, double the batch—leftovers make excellent lunchtime additions when paired with grilled proteins.
Why You'll Love This Recipe
- No-Chop Necessary: I swear by this one—just drain, dump, and stir. No prepping, no peeling, no messier-than-necessary steps. The beans and corn are already perfect; all you’re doing is giving them a little love with butter and garlic.
- Creamy-Garlic Magic: That heavy cream and melted butter? It turns this into something richer than you’d expect from canned veggies. The garlic gets toasted just enough to make every bite taste like it’s been simmering all day—no fancy technique required.
- Leftover Hero: This dish actually improves the next day. The flavors meld even better, and it’s still warm, creamy, and satisfying for lunch. I’ve reheated mine three times and never gotten tired of it.
- Budget Dinner Win: Five ingredients, all affordable, all pantry-friendly. You’re feeding a family for under $10, and honestly? No one will guess it’s not fresh-off-the-farm fancy. My kids ask for it more than steak night.
Step-by-step instructions for creamy garlic butter green beans and corn
This one-pot recipe transforms simple canned vegetables into a rich, velvety dish with minimal effort.
Sauté Shallots and Garlic in Butter
In a large skillet, melt the 0.5 cup unsalted butter over medium heat. Add the 2 whole shallots, finely diced, and cook for 4-5 minutes until they become translucent and just beginning to soften. Here's the thing—don't let them brown, or they'll add bitterness to your sauce.
Push the shallots to the side of the pan and add the 8 cloves minced garlic. Stir constantly for 30-45 seconds until the garlic releases its fragrant aroma—you'll know it's ready when it smells heavenly but hasn't turned golden. This step builds the aromatic foundation for your dish, so don't rush it.
Add Vegetables and Broth
Pour in the 0.25 cup chicken or vegetable broth and scrape up any browned bits from the bottom of the pan. These bits pack intense flavor, so don't skip this step. Add the 1 lb drained canned green beans and 1 lb drained canned corn kernels, stirring gently to combine with the shallot-garlic mixture.
Bring everything to a gentle simmer over medium-low heat. Let it cook for 5 minutes, stirring occasionally, until the vegetables begin to soften slightly and absorb some of the broth. This ensures they'll be tender when the cream comes in, not mushy.
Create the Creamy Sauce
Reduce the heat to low and gradually whisk in the 0.5 cup heavy cream. Stir continuously for 2-3 minutes until the sauce begins to thicken and coat the back of a spoon. The reason we do this slowly is to prevent curdling—the cream needs time to gently incorporate without breaking.
Add the 0.5 tsp diamond crystal kosher salt, 0.25 tsp freshly ground black pepper, and 0.25 tsp freshly grated nutmeg. Stir well to distribute the seasonings evenly. Taste and adjust the salt if needed—this is your chance to balance the flavors before adding the final brightening element.
Finish with Lemon and Olive Oil
Remove the skillet from heat and stir in the 1 tbsp fresh lemon juice. This brightens the rich creaminess and cuts through any heaviness. Return the pan to low heat and drizzle in the 1 tbsp extra-virgin olive oil, stirring gently to emulsify the sauce and add a silky finish.
For the final touch, sprinkle the 0.25 cup chopped fresh parsley over the top. This adds freshness and visual appeal. Serve immediately while the sauce is still warm and velvety—this dish doesn't wait, as the cream will thicken further as it cools.
Pro Tips For Making Canned Green Beans And Corn
- Drain and Rinse Properly: Dump those cans straight into a colander and run cold water over the beans and corn for 30 seconds—this cuts the canned taste that sneaks in. I used to skip this, and the metallic aftertaste always ruined the creamy finish, no matter how much butter I added.
- Sauté Garlic Low and Slow: Hit medium heat for the garlic—high heat burns it before it releases flavor. After 30 seconds, the edges should just start to turn golden, not brown. I learned this the hard way after making my kitchen smell like regret.
- Use Cold Heavy Cream: Stir in the cold heavy cream last, off the heat, and let it temper for 10 seconds before mixing—this prevents curdling. I was skeptical until I tried it; now I swear by it, especially when the sauce looks suspiciously lumpy.
- Finish with Butter in Stages: Swirl in half the butter at the end, let it melt, then add the rest while stirring constantly. This coats every kernel and bean evenly—no dry spots, no clumps. Sounds weird, but it works: the sauce becomes silky instead of greasy.
Make-ahead tips for this canned green beans and corn
Prep Ahead Strategy
Start by prepping all your ingredients the night before—this dish is all about efficiency. Drain and rinse the 1 lb canned green beans and 1 lb canned corn and store them in a quart-size airtight container in the fridge.
Mince the 8 garlic cloves and finely dice the 2 shallots, then place them in a small bowl with a splash of water to keep them fresh. Chop the 0.25 cup fresh parsley and store it separately.
This prep work takes just 10 minutes and makes your cooking day effortless. 💡
Freezer-Friendly Portions
Make this dish a meal prep superstar by dividing it into single-serving portions before freezing. After cooking, let it cool completely, then transfer to silicone ice cube trays (yes, really!) or small airtight containers. Each cube or container will thaw perfectly for a quick lunch or side dish.
Label with the date—this creamy goodness keeps for up to 3 months without losing its velvety texture. I love freezing individual portions because they reheat beautifully for busy weeknights. ❄️
Broth Boost for Flavor
Here's a pro tip: Make a batch of your favorite homemade chicken or vegetable broth and freeze it in ice cube trays. When you're ready to cook, just grab a few cubes and toss them straight into the pan—no thawing required.
The broth adds depth that store-bought versions can't match. I keep a stash in my freezer specifically for quick sides like this one. For extra richness, add 1 tbsp butter to the broth cubes before freezing. 💛
Reheating Like a Pro
When reheating, never microwave this dish straight from the fridge—it'll turn rubbery. Instead, transfer to a skillet over low heat and add 1-2 tbsp broth or water to restore moisture. Cover and heat for 5-7 minutes, stirring occasionally, until warmed through.
The gentle heat prevents the cream from breaking and keeps the vegetables tender. For best results, reheat only what you plan to eat immediately, as the sauce thickens further upon standing. 🔥
Double Batch for Meal Prep
This recipe scales perfectly for meal prep—just double the ingredients and follow the same steps. Store the extra portions in glass storage containers with tight-sealing lids. The flavors actually improve overnight as the spices meld together.
I like to prep two batches on Sundays: one for the week and one to freeze for later. Add a sprinkle of fresh parsley just before serving to maintain that restaurant-quality presentation. 🌿
Garnish on Demand
Keep your garnishes separate until serving time. Store the 0.25 cup chopped parsley and 1 tbsp extra-virgin olive oil in small containers in the fridge. Just before serving, give the dish a final drizzle of olive oil and sprinkle with parsley.
This keeps the dish looking fresh and vibrant, even if it's been prepped ahead. The lemon juice can be added fresh at the table too—just squeeze it directly onto individual portions for that bright, zesty finish. ✨
Nutrition facts
Frequently asked questions
Can I use frozen green beans and corn instead of canned?
Frozen vegetables work perfectly here—just thaw them first by soaking in cold water for 5 minutes or using the microwave's defrost setting. Drain well before adding to the pan. Frozen versions often have a slightly sweeter taste and retain more nutrients. The texture will be slightly different but still delicious in this creamy sauce.
How do I make this dish dairy-free?
Swap the heavy cream for ½ cup full-fat coconut milk and use olive oil or vegan butter instead of regular butter. The coconut milk adds a subtle tropical note that pairs surprisingly well with the garlic and lemon. For extra richness, stir in 1 tbsp nutritional yeast at the end for a cheesy flavor without dairy.
Why did my sauce separate or curdle?
This usually happens when cream is added too quickly or over high heat. Always stir continuously over low heat and add the cream gradually. If it happens, whisk in 1 tbsp cold water or broth to re-emulsify. For next time, try whisking the cream with a splash of cold water before adding to the pan—this helps stabilize it.
Can I make this recipe in a slow cooker?
Yes! Sauté the shallots and garlic in butter first, then transfer everything to a 3-4 quart slow cooker. Cook on low for 2-3 hours, stirring occasionally. The cream will thicken naturally in the slow cooker. For extra flavor, add ½ cup broth at the start. The result is even creamier and more flavorful than stovetop.
What's the best way to serve this with proteins?
This creamy side pairs beautifully with grilled chicken breasts, pan-seared salmon, or roasted pork chops. For a vegetarian option, serve with garlic bread or a simple white bean salad. The rich sauce complements both light and hearty proteins perfectly, making it a versatile weeknight meal.